2011-12-23

Firefox - Remove dotted line around links

Oh, how annoying that dotted line around linked elements in Firefox is! Dotted line around links. Courtesy sonspring.com There are many articles describing how to remove it for your website. I don't like the idea - it should be up to the user to decide. So I, as a user, decided to remove them from my browser. How?
  1. Type about:config in Firefox address bar.
  2. If it displays a warning, confirm you know what you're doing.
  3. Find this property (you can use the filter): browser.display.focus_ring_width
  4. Set its value to 0 (zero).
Ahh...

2011-12-21

[FIXED] VirtualBox kernel driver not installed rc 1908

This time this helped with my VirtualBox problems (Ubuntu host, Windows guest).
sudo dkms install virtualbox/4.1.2
sudo modprobe vboxdrv

2011-12-18

2011-11-20

Use SLF4J with JBoss AS7

SLF4J is a module in JBoss AS7. I therefore assumed it would not be necessary to ship SLF4J with my web application. To my surprise, my application failed with a ClassNotFoundException.
Caused by:
java.lang.ClassNotFoundException:
org.slf4j.Logger
Hmm... How can I use a JBoss AS7 module as a dependency? The solution is to add the org.slf4j entry as a MANIFEST.MF dependency. The MANIFEST.MF file looks then like that:
Manifest-Version: 1.0
Archiver-Version: Plexus Archiver
Created-By: Apache Maven
Built-By: M1key
Build-Jdk: 1.6.0_27
Dependencies: org.slf4j
Maven can do it for you automatically.
<plugin>
               <groupId>org.apache.maven.plugins</groupId>
               <artifactId>maven-war-plugin</artifactId>
               <configuration>
                   <archive>
                       <manifestEntries>
                           <Dependencies>org.slf4j</Dependencies>
                       </manifestEntries>
                   </archive>
               </configuration>
           </plugin>
I guess I should have RTFM... More about class loading in AS7.

2011-10-30

Wizard form with Spring MVC

Today I will show you how to create a wizard form with Spring MVC. A wizard form is a multi-step form that allows users to submit information gradually. With Spring MVC it's very easy to make such a form, as well as validate already submitted data on each step and on finish.

Controller

This is the main thing. Let's take a detailed look.

The controller is annotated with the @Controller annotation. @RequestMapping specifies its path. Also, we are storing user submitted data (an instance of my custom transfer object called PersonTo) in session with the @SessionAttributes annotation.
@Controller
@RequestMapping("/personRegistration")
@SessionAttributes("personTo")
public class PersonRegistrationController {
Now, let's take a look at initialisation code. The controller expects an appropriate validator to be passed during construction time. The validator is, in our case, a Spring bean, so we can have it autowired.
Then we initialise an init binder for the custom Gender enum. That allows incoming string parameters to be converted into enum instances.
@Autowired
   public PersonRegistrationController(PersonRegistrationValidator validator) {
       super();
       this.validator = validator;
   }

   @InitBinder
   public void initBinder(WebDataBinder binder) {
       binder.registerCustomEditor(Gender.class, new GenderEditor());
   }
Next, look at the method that handles GET requests. This method resets the potentially submitted data by creating a new PersonTo object and storing it in session. It requests the registration name form to be displayed. (The forms code will soon follow)
   @RequestMapping(method = RequestMethod.GET)
   public String setupForm(Model model) {
       PersonTo personTo = new PersonTo();
       model.addAttribute(PERSON_TO, personTo);
       return REGISTRATION_NAME_FORM;
   }
And now the big thing. The method that handles POST requests which are those where the user actually submitted data.
@RequestMapping(method = RequestMethod.POST)
   public String submitForm(HttpServletRequest request,
           HttpServletResponse response,
           @ModelAttribute(PERSON_TO) PersonTo personTo, BindingResult result,
           SessionStatus status, @RequestParam("_page") int currentPage,
           Model model) {

       Map<Integer, String> pageForms = new HashMap<Integer, String>();
       pageForms.put(0, REGISTRATION_NAME_FORM);
       pageForms.put(1, REGISTRATION_GENDER_FORM);

       if (userClickedCancel(request)) {
           status.setComplete();
           return REDIRECT_TO_HOMEPAGE;
       } else if (userIsFinished(request)) {
           validator.validate(personTo, result);
           if (result.hasErrors()) {
               return pageForms.get(currentPage);
           } else {
               log.info("Registration finished for person [{}: {}].",
                       personTo.getGender(), personTo.getName());
               personTo.setRegistrationComplete(true);
               return REDIRECT_TO_SUCCESS_PAGE;
           }
       } else {
           int targetPage = WebUtils.getTargetPage(request, "_target",
                   currentPage);
           if (userClickedPrevious(currentPage, targetPage)) {
               return pageForms.get(targetPage);
           } else {
               switch (currentPage) {
               case 0:
                   validator.validateName(personTo, result);
                   break;
               }
               case 1:
                   validator.validateGender(personTo, result);
                   break;
               }


               if (result.hasErrors()) {
                   return pageForms.get(currentPage);
               } else {
                   return pageForms.get(targetPage);
               }
           }
       }
   }
  1. If the user clicked cancel, cancel the whole thing by ending the session and redirect to the home page.
  2. If the user is finished, validate the whole session stored transfer object. Redirect to success page or display errors.
  3. Otherwise, this is another step in the wizard. In that case, establish which step it is and apply correct validation. If there are errors, show the current page where Spring will display error messages. If everything is OK, go to the next page.

View

I'm using Velocity. Here's the first form where the user types their name. Look at the Next and Cancel buttons (the names are important, _target1 and _cancel) and at the hidden input with page number (zero, since this is the first page in the wizard).
       <form method="post" modelAttribute="personTo">
           <table>
               <tr>
                   <td>Your name:</td>
                   <td>#springFormInput("personTo.name" "")
                   </td>
                   <td>#springShowErrors("" "")
                   </td>
               </tr>
               <tr>
                   <td colspan="3">
                       <input type="submit" value="Next" name="_target1">
                       <input type="submit" value="Cancel" name="_cancel">
                       <input type="hidden" value="0" name="_page">
                   </td>
               </tr>
           </table>
       </form>
And the gender selection page. Note we are using a drop down list here.
       <form method="post" modelAttribute="personTo">
           <table>
               <tr>
                   <td>Your gender:</td>
                   <td>#springFormSingleSelect("personTo.gender" $genders "")
                   </td>
                   <td>#springShowErrors("" "")
                   </td>
               </tr>
               <tr>
                   <td colspan="3">
                       <input type="submit" value="Previous" name="_target0">
                       <input type="submit" value="Finish" name="_finish">
                       <input type="submit" value="Cancel" name="_cancel">
                       <input type="hidden" value="1" name="_page">
                   </td>
               </tr>
           </table>
       </form>

Property editor

Here's the GenderEditor, if you're interested.
public class GenderEditor extends PropertyEditorSupport {

   @Override
   public String getAsText() {
       if (getValue() == null) {
           return null;
       } else {
           Gender gender = (Gender) getValue();
           return gender.toString();
       }
   }

   @Override
   public void setAsText(String text) throws IllegalArgumentException {
       if (StringUtils.isEmpty(text)) {
           setValue("");
       } else if (text.equalsIgnoreCase("m")) {
           setValue(Gender.MALE);
       } else if (text.equalsIgnoreCase("f")) {
           setValue(Gender.FEMALE);
       } else if (text.equalsIgnoreCase("o")) {
           setValue(Gender.OTHER);
       }
   }
}
We need the getAsText() method for validation purposes. That makes sure that if an unknown value is passed from the view, the resulting value is null (as opposed to the String "null").

Download the source code

The source code for this is available on GitHub.

2011-10-23

JEE6: Integration testing with JBoss 7

Introduction

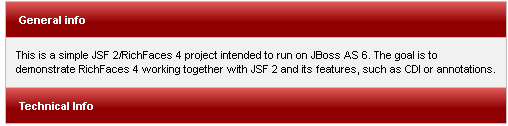
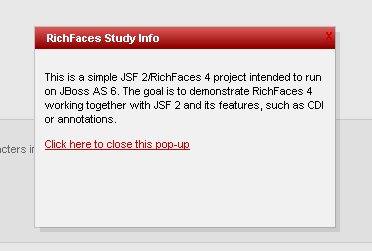
When your code utilises some of the JEE6 goodies, such as CDI or EJB, then it may become handy if not necessary to execute the tests for this code on the actual server as opposed to running it in a mocked unit test environment. Benefits?
  • Your tests run in the same environment (or similar) as your production code.
  • In certain cases, it actually makes testing possible, because even when using mocking certain JEE6 behaviours are hard to simulate in a unit test.
JBoss 5 was so slow... But with JBoss 7 it doesn't take so much time to start up the server. So tests can run as a part of your Maven build or inside your IDE.

Configuration

Here I will show you how to set it all up. I did it myself, it works, and you can checkout the source yourself from GitHub.

What are we testing?

First, let's take a look at the class under test.
import javax.ejb.Local;
import javax.ejb.Singleton;
import javax.persistence.EntityManager;
import javax.persistence.PersistenceContext;

import me.m1key.audiolicious.domain.entities.Song;
import me.m1key.audiolicious.services.SongRepository;

@Singleton
@Local(SongRepository.class)
public class JpaSongRepository implements SongRepository {

   @PersistenceContext
   private EntityManager entityManager;

   @Override
   public void save(Song song) {
       entityManager.persist(song);
   }
}
As you can see, it does not do a lot - but it is an EJB and it uses @PersistenceContext. I did not expose any way to set the entityManager because I don't like having to change production code just so that tests can run. So, that would be rather hard to mock. But we don't have to mock, we are going to run the test on the server.

The test

import static org.junit.Assert.assertEquals;
import static org.junit.Assert.assertNotNull;

import java.io.IOException;
import java.util.Date;

import javax.inject.Inject;

// Certain imports omitted for brevity.

import org.jboss.arquillian.container.test.api.Deployment;
import org.jboss.arquillian.junit.Arquillian;
import org.jboss.shrinkwrap.api.ArchivePaths;
import org.jboss.shrinkwrap.api.ShrinkWrap;
import org.jboss.shrinkwrap.api.asset.EmptyAsset;
import org.jboss.shrinkwrap.api.spec.WebArchive;
import org.jboss.shrinkwrap.resolver.api.DependencyResolvers;
import org.jboss.shrinkwrap.resolver.api.maven.MavenDependencyResolver;
import org.junit.After;
import org.junit.Test;
import org.junit.runner.RunWith;

@RunWith(Arquillian.class)
public class JpaSongRepositoryIT {

   // Stuff omitted for brevity.
   
   private Date albumDateAdded = new Date();
   private Date albumDateModified = new Date();
   private Date albumDateSkipped = new Date();

   @Inject
   private SongRepository jpaSongRepository;
   @Inject
   private RepositoriesTestHelperBean testHelperBean;

   @Deployment
   public static WebArchive createTestArchive()
           throws IllegalArgumentException, IOException {
       return ShrinkWrap
               .create(WebArchive.class,
                       JpaSongRepositoryIT.class.getSimpleName() + ".war")
               .addAsWebInfResource(EmptyAsset.INSTANCE,
                       ArchivePaths.create("beans.xml"))
               .addAsResource("log4j.xml", "log4j.xml")
               .addAsResource("META-INF/persistence.xml",
                       "META-INF/persistence.xml")
               .addClasses(Album.class, Artist.class, JpaSongRepository.class,
                       NullAlbum.class, NullArtist.class,
                       NullEntitiesFactory.class, Rating.class,
                       RatingTo.class, Song.class, SongRepository.class,
                       SongTo.class, RepositoriesTestHelperBean.class,
                       TrackTo.class)
               .addAsLibraries(
                       DependencyResolvers
                               .use(MavenDependencyResolver.class)
                               .artifacts("org.slf4j:slf4j-api:1.6.1",
                                       "org.slf4j:slf4j-log4j12:1.6.1",
                                       "commons-lang:commons-lang:2.6")
                               .resolveAsFiles());
   }

   @Test
   public void shouldCreateAndRetrieveSong() {
       assertEquals("There should be no songs before any are created.",
               Long.valueOf(0), testHelperBean.totalSongs());

       Artist artist = testHelperBean.createArtist(ARTIST_NAME);
       Album album = testHelperBean.createAlbum(ALBUM_NAME, artist,
               new Rating(80));
       Song song = new Song(SONG_1_NAME, ARTIST_NAME, album, 1988,
               "Zakk Wylde/Bob Daisley/Ozzy Osbourne", "Rock", albumDateAdded,
               albumDateModified, new Rating(80), 9, albumDateSkipped, 0,
               false, 0, 0, false);
       jpaSongRepository.save(song);

       assertNotNull("Saved song should not be null.",
               testHelperBean.getSongByUuid(song.getUuid()));
   }
  
   // Other tests omitted for brevity.
}
Let's take a closer look. First, the test is annotated with @RunWith(Arquillian.class). That is because we need Arquillian to orchestrate the entire test. Arquillian will handle our @Deployment. This is where, using ShrinkWrap, we create the WAR file with our test and what we want to test with all its dependencies, also the external ones, from our pom.xml. This WAR file will be deployed to JBoss 7 when you run the test with Maven or from within your IDE. I must admit that getting the dependencies right (i.e. giving it exactly what it needs and not too much) can be a bit tiresome and frustrating.

Dependencies

Below are the relevant dependencies.
       <dependency>
           <groupId>javax.inject</groupId>
           <artifactId>javax.inject</artifactId>
           <scope>provided</scope>
       </dependency>
       <dependency>
           <groupId>org.jboss.spec</groupId>
           <artifactId>jboss-javaee-web-6.0</artifactId>
           <type>pom</type>
           <scope>provided</scope>
       </dependency>
       <dependency>
           <groupId>org.jboss.as</groupId>
           <artifactId>jboss-as-arquillian-container-managed</artifactId>
           <scope>test</scope>
       </dependency>
       <dependency>
           <groupId>org.jboss.shrinkwrap</groupId>
           <artifactId>shrinkwrap-api</artifactId>
           <scope>test</scope>
       </dependency>
       <dependency>
           <groupId>org.jboss.shrinkwrap.resolver</groupId>
           <artifactId>shrinkwrap-resolver-impl-maven</artifactId>
           <scope>test</scope>
       </dependency>
       <dependency>
           <groupId>junit</groupId>
           <artifactId>junit</artifactId>
           <scope>test</scope>
       </dependency>
       <dependency>
           <groupId>org.jboss.arquillian.junit</groupId>
           <artifactId>arquillian-junit-container</artifactId>
           <scope>test</scope>
       </dependency>

arquillian.xml

You also need to provide an arquillian.xml file in your src/test/resources. Below is my entire file.
<?xml version="1.0" encoding="UTF-8"?>
<arquillian xmlns="http://jboss.org/schema/arquillian"
   xmlns:xsi="http://www.w3.org/2001/XMLSchema-instance"
   xsi:schemaLocation="http://jboss.org/schema/arquillian
       http://jboss.org/schema/arquillian/arquillian_1_0.xsd">

   <!-- Uncomment to have test archives exported to the file system for inspection -->
   <engine>
       <property name="deploymentExportPath">target/</property>
   </engine>

   <container qualifier="jboss" default="true">
       <protocol type="jmx-as7">
           <property name="executionType">REMOTE</property>
       </protocol>
   </container>

</arquillian>
When the test is running, it's running on a remote instance of JBoss. That means you have to download JBoss 7 yourself. You can hardcode its location in this file, but it's not a good idea if you're sharing the project with other people. Instead, you can set your JBOSS_HOME system variable to something like e:\Servers\jboss-as-web-7.0.0.Final.

Download sample source code

As always, working code is available for you to download. Get it now from GitHub. There is a text file called SETUP that explains how to get it going (the database and so on). If you have any questions, feel free to post them here and I will do my best to answer.

2011-10-17

jQuery UI Autocomplete + Spring MVC

jQuery UI offers a nice autocomplete component. In this short tutorial I will show you how to use it with Spring 3 MVC back end.

The view

Let's look at the view first. I'm using Velocity here and below you can only see a tiny bit of the file.
       <form method="post" action="">
           <table>
               <tr>
                   <td>Your name:</td>
                   <td>#springFormInput("reservation.userName" "")
                   </td>
                   <td>#springShowErrors("" "")
                   </td>
               </tr>
This will create an input field with an ID userName.

HTML metadata

<link type="text/css"

href="../css/humanity/jquery-ui-1.8.16.custom.css"
   rel="stylesheet" />
<link type="text/css" href="../css/basic.css" rel="stylesheet" />
<script type="text/javascript"

src="../js/jquery-1.6.2.min.js"></script>
<script type="text/javascript"

src="../js/jquery-ui-1.8.16.custom.min.js"></script>
<script>
   $(function() {
       $( "input:submit" ).button();
   });
</script>
<style>
   .ui-autocomplete-loading { background:

white url('../images/ui-anim_basic_16x16.gif') right center no-repeat; }
</style>
<script type="text/javascript" src="../js/autocomplete.js"></script>
Only the last line is non-standard. That's my custom JS file.

autocomplete.js

That's my custom JS file based heavily on the example jQuery UI have on their site.
$(function() {
   $("#userName").autocomplete(
       {
           source : function(request, response) {
               $.ajax({
                   url : "names",
                   dataType : "json",
                   data : {
                       term : request.term
                   },
                   success : function(data) {
                       response($.map(data.names, function(item) {
                           return {
                               label : item.label,
                               value : item.label
                           }
                       }));
                   }
               });
           },
           minLength : 1
       });
});
Let's explain it step by step. On windows load, the nameless function will run. Using jQuery selector I'm selecting the HTML element with ID userName. Then I'm calling the autocomplete() function on it that will turn it into an autocomplete input. It accepts many parameters; here I only use source and minLength because they are sufficient.
minLength specifies the content length threshold for back end query trigger. 1 means you only have to type 1 character to get suggestions.
source declares a function to handle response. That gives us the flexibility we need to handle our JSON response which looks like that:
{"names":[{"label":"Michael","value":"1"},{"label":"Mike","value":"2"},{"label":"Mikey","value":"3"}]}
This bit:
$.map(data.names, function(item)
… selects the names field from the response. Then, we have to select the label and value. Label is what will be displayed in the suggestion box. Value is what will be ultimately selected. In my case I chose to ignore the returned value (which is a number, as you can see) and just use the label field.

Back end - the controller

@Controller
@RequestMapping("/names")
public class NamesController {

   private static final Logger log = LoggerFactory
           .getLogger(NamesController.class);

   @RequestMapping(method = RequestMethod.GET)
   public String getNames(Model model,
           @RequestParam(required = false) String term) {
       log.debug("getNames(\"{}\")", term);
       model.addAttribute("names", Arrays.asList(names));
       return "jsonNames";
   }

   private LabelValueTo[] names = new LabelValueTo[] {
           new LabelValueTo("Michael", "1"), new LabelValueTo("Mike", "2"),
           new LabelValueTo("Mikey", "3") };

}
I have already written a bit about Spring and JSON so I will not comment that in great detail. Notice that I'm returning a view called jsonNames. What happens with it next?

Back end - view resolvers

I have these 2 view resolvers declared (there is more configuration to it - to get it download the source).
    <bean class="org.springframework.web.servlet.view.XmlViewResolver">
       <property name="order" value="0" />
       <property name="location" value="/WEB-INF/views.xml" />
   </bean>

   <bean id="viewResolver"
       class="org.springframework.web.servlet.view.velocity.VelocityViewResolver">
       <property name="order" value="1" />
       <property name="cache" value="true" />
       <property name="prefix" value="/WEB-INF/vm/" />
       <property name="suffix" value=".vm" />
       <property name="exposeSpringMacroHelpers" value="true" />
   </bean>
And the referenced view.xml file:
<bean name="jsonNames"
       class="org.springframework.web.servlet.view.json.MappingJacksonJsonView" />

Summary

And that's it. I think it's pretty straightforward. Feel free to post comments and questions. Download the source from GitHub.

2011-09-25

jQuery - Graphic photo

If you've been to websites that display photographs, you may have seen this little gadget - potentially graphic photographs are hidden from the user and they are only displayed when he or she confirms the desire to see it. One example of this is The Big Picture. Graphic image display - before click and after
I decided to develop something like that in jQuery. Here it is for you to download! Let's take a look at the HTML code first.
<h2>Crane fly</h2>
<div class="photo">
<div class="title">
<strong>Crane fly</strong>
</div>
<div class="aroundImage" style="height: 534px;">
<div class="warning">
<a href="javascript:void(0)">Click here to view this image.</a>
</div>
<img src="images/macro03.jpg" alt="Crane fly - Macro Work" class="hidden" />
</div>
<div class="description">
This is a <em>tipula oleracea</em>. Its wingspan can reach 6cm!
</div>
</div>
What that does is it displays a black square where the photo should be, with a warning. It has the height put in explicitly to reflect the size of the picture. If the user clicks anywhere on the black square (not necessarily the warning message), the photo will appear. Now, the interesting bit, the jQuery bit.
$(function() {   
    // This will run on windows onload.

    $('div.warning a').bind('click', function(event) {
        var $aroundImage = $(event.target).closest('div.aroundImage').click();
    });

    $('div.aroundImage').bind('click', function(event) {
        var $aroundImage = $(event.target);
        var $hiddenImage = $aroundImage.children('img');
        var $warningMessage = $aroundImage.children('div.warning');

        $hiddenImage.show();
        $warningMessage.hide();
        $aroundImage.css('cursor', 'default');
    });
});
OK, let's describe it step by step. The whole thing is wrapped in this:
$(function() {   
    // This will run on windows onload.
    // ...
});
The dollar sign ($) is obviously jQuery. By passing it a function like that we make sure that the function will run when the HTML document is loaded, i.e. when all page elements are available. What is worth mentioning, you can make the call many times and all of the given functions will run when body is loaded in the order they are declared.
$(function() {/* ... */});
Let's now take a look at this.
    $('div.aroundImage').bind('click', function(event) {
        var $aroundImage = $(event.target);
        var $hiddenImage = $aroundImage.children('img');
        var $warningMessage = $aroundImage.children('div.warning');

        $hiddenImage.show();
        $warningMessage.hide();
        $aroundImage.css('cursor', 'default');
    });
Here we use jQuery bind function to bind an event, which is a jQuery preferred way of event handling free from browser inconsistencies. We then obtain the hidden image to show it and the warning message to hide it. We also change the cursor to the default one (from pointer) because there is nothing else to click on. Here we redirect warning message onclick event to the div onclick event to avoid duplicating code.
    $('div.warning a').bind('click', function(event) {
        var $aroundImage = $(event.target).closest('div.aroundImage').click();
    });
What is good about this jQuery code is that it doesn't care how many hidden images you have on the page. And the images don't need to have unique IDs or anything like that.

2011-09-22

Istanbul - Photos

Hi there. I have recently visited Turkey and I would like to share two galleries with you.
Life in Istanbul
Istsanbul Sights

2011-08-25

Audiolicious - JEE 6 showcase

I've been working for a while on a JEE application that would demonstrate the following:
  • CDI
  • EJB 3.1
  • JSF
  • JBoss Seam

I managed to develop something that does not have the JSF and JBoss Seam bits yet, but does have CDI and EJB 3.1. It also uses Arquillian, ShrinkWrap and a number of other technologies.

Why could it be of your interest? It presents CDI and EJB 3.1 in non-trivial use, as well as both unit and integration testing of these.

Check out the code from GitHub and take a look yourself.

2011-07-18

[FIXED] the virtualbox kernel modules do not match this version

I got this error from VirtualBox (Ubuntu Host, Windows guest) after kernel upgrade:

the virtualbox kernel modules do not match this version
rtr3init failed with rc 1912 rc 1912 ubuntu
'/etc/init.d/vboxdrv setup'

To fix it I ran these commands:
sudo apt-get install linux-headers-$(uname -r)
sudo /etc/init.d/vboxdrv setup
It helped.

2011-07-13

Testing JPA

I'm developing my own JEE project (more info soon, source code will be available) and while it's not going to be a vanilla JEE application, I intend not to use Spring. I reached the phase of writing JPA entities and wanted to test them, their associations and operations on them, using an embedded database. Turns out, it's not so obvious. What I wanted is to have my @PersistenceContext injected without having to run those tests on an embedded/stand-alone application server.

And Spring does it so nicely...

I talked to Adam Bien and Jacek Laskowski about this.

Adam's solution


Adam suggested I take a look at his x-ray application. What he does to test JPA is he instantiates EntitytManager himself for each @Test method.

           EntityManagerFactory entityManagerFactory = Persistence
                   .createEntityManagerFactory("testPu");
           entityManager = entityManagerFactory.createEntityManager();

He then sets this EntityManager on the DAO/repository directly (not using a setter), on a package-level exposed field. It will not work if your DAO/repository is instantiated by CDI - you must use a package-level exposed method. Then it works (proxying).

Still, I didn't quite like this solution because it forces you to expose a field/method you wouldn't otherwise expose, and because it doesn't reflect reality where @PersistenceContext is injected.

Jacek's solution


Jacek had a different approach. One that didn't require exposing the field. You can view his test.

What he does is he uses OpenEJB to inject @PersistenceContext.

I decided I didn't like the boilerplate and I began to wonder whether Arquillian could inject @PersistenceContext for me.

Arquillian


Unfortunately, it turned out that Arquillian does not inject @PersistenceContext. I asked Dan Allen and Aslak Knutsen about it.

I decided it would be best if I could see whether Arquillian could do this so I forked Arquillian's source code on GitHub and I'm currently playing with it. It looks promising, so who knows, maybe it will save some hassle and boilerplate!

2011-05-29

JTA transactions with Hibernate, JBoss 6 and Spring 3

In this post I will show you how to use JTA transactions with JBoss 6 server, Spring 3 and Hibernate 3.

In JEE, JTA allows transactions to be distributed across multiple resources. You don't need a JEE server though to run JTA transactions, Tomcat will do (possibly with a bit more hassle).
I decided to use JBoss 6 because it is a popular JEE server - but I would assume you can successfully run the code on any server as long as the data source is set correctly (plus with minor tweaks of server dependent stuff).

(I also wrote a post on non-jta transactions with Spring 3, JBoss 6 and Hibernate 3.)

applicationContext.xml


This is our Spring config file.

<bean id="entityManagerFactory"
       class="org.springframework.orm.jpa.LocalEntityManagerFactoryBean">
       <property name="persistenceUnitName" value="Dogs" />
   </bean>

   <bean id="dogsDao" class="me.m1key.springtx.dao.DogsDaoImpl" />

   <bean id="dogsBean" class="me.m1key.springtx.beans.DogsBean"
       scope="singleton">
       <property name="dogsDao" ref="dogsDao" />
   </bean>

   <tx:annotation-driven transaction-manager="myTransactionManager" />
   <tx:jta-transaction-manager />

   <bean id="myTransactionManager"
       class="org.springframework.transaction.jta.JtaTransactionManager" />

   <bean
       class="
       org.springframework.orm.jpa.support.PersistenceAnnotationBeanPostProcessor " />
Look closely, notice the jta-transaction-manager annotation and JtaTransactionManager.

persistence.xml


This is our persistence.xml. It's a bit different from the non-jta version.

…
    <persistence-unit name="Dogs" transaction-type="JTA">
       <provider>org.hibernate.ejb.HibernatePersistence</provider>
       <jta-data-source>java:/DogsDS</jta-data-source>
       <class>me.m1key.springtx.entities.Dog</class>

       <properties>
           <property name="hibernate.transaction.manager_lookup_class"
               value="org.hibernate.transaction.JBossTransactionManagerLookup" />
           <property name="hibernate.show_sql" value="true" />
           <property name="hibernate.format_sql" value="true" />
           <property name="hibernate.hbm2ddl.auto" value="create" />
       </properties>
   </persistence-unit>
…
Notice the transaction-type attribute. It's JTA as opposed to RESOURCE_LOCAL in the case of non-JTA. You must also specify transaction manager lookup class which is server dependent.

DAO


@PersistenceContext
  private EntityManager em;

  @SuppressWarnings("unchecked")
  @Transactional(readOnly = true)
  public List<Dog> retrieveAllDogs() {
      return em.createQuery("from Dog").getResultList();
  }

That's it! To run this example you need a database server running. I'm using HSQLDB. You can download source code and there is a batch file there that runs this HSQLDB server. The application is to be deployed on JBoss 6.

You call the transactional operation by accessing http://localhost:8080/springtx-jta-0.0.1-SNAPSHOT/myurl.

pom.xml


For reference, the relevant parts of the POM file.

<dependencies>
       <dependency>
           <groupId>org.hibernate</groupId>
           <artifactId>hibernate-core</artifactId>
           <version>3.6.0.Final</version>
           <scope>provided</scope>
       </dependency>
       <dependency>
           <groupId>org.hibernate</groupId>
           <artifactId>hibernate-commons-annotations</artifactId>
           <version>3.2.0.Final</version>
           <scope>provided</scope>
       </dependency>
       <dependency>
           <groupId>org.hibernate.javax.persistence</groupId>
           <artifactId>hibernate-jpa-2.0-api</artifactId>
           <version>1.0.0.Final</version>
           <scope>provided</scope>
       </dependency>
       <dependency>
           <groupId>org.hibernate</groupId>
           <artifactId>hibernate-entitymanager</artifactId>
           <version>3.6.0.Final</version>
           <type>jar</type>
           <scope>provided</scope>
       </dependency>
       <dependency>
           <groupId>hsqldb</groupId>
           <artifactId>hsqldb</artifactId>
           <version>1.8.0.7</version>
           <type>jar</type>
           <scope>provided</scope>
       </dependency>
       <dependency>
           <groupId>org.springframework</groupId>
           <artifactId>spring-core</artifactId>
           <version>3.0.3.RELEASE</version>
           <type>jar</type>
           <scope>compile</scope>
       </dependency>
       <dependency>
           <groupId>org.springframework</groupId>
           <artifactId>spring-aop</artifactId>
           <version>3.0.3.RELEASE</version>
           <type>jar</type>
           <scope>compile</scope>
       </dependency>
       <dependency>
           <groupId>org.springframework</groupId>
           <artifactId>spring-tx</artifactId>
           <version>3.0.3.RELEASE</version>
           <type>jar</type>
           <scope>compile</scope>
       </dependency>
       <dependency>
           <groupId>org.slf4j</groupId>
           <artifactId>slf4j-api</artifactId>
           <version>1.5.8</version>
       </dependency>
       <dependency>
           <groupId>org.slf4j</groupId>
           <artifactId>slf4j-simple</artifactId>
           <version>1.5.8</version>
       </dependency>
       <dependency>
           <groupId>commons-collections</groupId>
           <artifactId>commons-collections</artifactId>
           <version>3.1</version>
           <type>jar</type>
           <scope>compile</scope>
       </dependency>
       <dependency>
           <groupId>org.springframework</groupId>
           <artifactId>spring-test</artifactId>
           <version>3.0.3.RELEASE</version>
           <type>jar</type>
           <scope>test</scope>
       </dependency>
       <dependency>
           <groupId>junit</groupId>
           <artifactId>junit</artifactId>
           <version>4.8.1</version>
           <type>jar</type>
           <scope>test</scope>
       </dependency>
       <dependency>
           <groupId>org.springframework</groupId>
           <artifactId>spring-context</artifactId>
           <version>3.0.3.RELEASE</version>
           <type>jar</type>
           <scope>compile</scope>
       </dependency>
       <dependency>
           <groupId>org.springframework</groupId>
           <artifactId>spring-orm</artifactId>
           <version>3.0.3.RELEASE</version>
           <type>jar</type>
           <scope>compile</scope>
       </dependency>
       <dependency>
           <groupId>org.jboss.spec.javax.servlet</groupId>
           <artifactId>jboss-servlet-api_3.0_spec</artifactId>
           <version>1.0.0.Final</version>
           <scope>provided</scope>
       </dependency>
       <dependency>
           <groupId>cglib</groupId>
           <artifactId>cglib</artifactId>
           <version>2.2</version>
       </dependency>
   </dependencies>
   <repositories>
       <repository>
           <id>r.j.o-groups-public</id>
           <url>https://repository.jboss.org/nexus/content/groups/public/</url>
       </repository>
   </repositories>

2011-05-25

Non JTA transactions with Hibernate, JBoss 6 and Spring 3

Hi there, I'm going to show you how to set up your JEE project to use non-JTA transactions with JBoss AS 6, Spring 3, Hibernate and JPA annotations.
Please note - integration tests don't require a database server running - they instantiate their own in-memory database server.

(Interested in JTA with Hibernate 3, Spring 3 and JBoss 6 instead?)

applicationContext.xml


This is our Spring config file.

<?xml version="1.0" encoding="UTF-8"?>
<beans xmlns="http://www.springframework.org/schema/beans"
   xmlns:xsi="http://www.w3.org/2001/XMLSchema-instance" xmlns:p="http://www.springframework.org/schema/p"
   xmlns:aop="http://www.springframework.org/schema/aop" xmlns:tx="http://www.springframework.org/schema/tx"
   xsi:schemaLocation="http://www.springframework.org/schema/beans
       http://www.springframework.org/schema/beans/spring-beans.xsd
       http://www.springframework.org/schema/aop
          http://www.springframework.org/schema/aop/spring-aop.xsd
          http://www.springframework.org/schema/tx
          http://www.springframework.org/schema/tx/spring-tx.xsd
          http://www.springframework.org/schema/context
       http://www.springframework.org/schema/context/spring-context.xsd">

   <bean id="entityManagerFactory"
       class="org.springframework.orm.jpa.LocalEntityManagerFactoryBean">
       <property name="persistenceUnitName" value="Dogs" />
   </bean>

   <bean id="dogsDao" class="me.m1key.springtx.dao.DogsDaoImpl" />

   <bean id="dogsBean" class="me.m1key.springtx.beans.DogsBean"
       scope="singleton">
       <property name="dogsDao" ref="dogsDao" />
   </bean>

   <tx:annotation-driven transaction-manager="myTransactionManager" />

   <bean id="myTransactionManager" class="org.springframework.orm.jpa.JpaTransactionManager">
       <property name="entityManagerFactory" ref="entityManagerFactory" />
   </bean>

   <bean
       class="org.springframework.orm.jpa.support.PersistenceAnnotationBeanPostProcessor" />
</beans>
What's worth noting is the transaction manager. Because we are not using JTA, we must explicitly provide the transaction manager for the application to use.

persistence.xml


Next, let's look at our persistence.xml file.

…
<persistence-unit name="Dogs" transaction-type="RESOURCE_LOCAL">       <non-jta-data-source>java:/DogsDS</non-jta-data-source>
      <class>me.m1key.springtx.entities.Dog</class>

      <properties>
          <property name="hibernate.show_sql" value="true" />
          <property name="hibernate.format_sql" value="true" />
          <property name="hibernate.hbm2ddl.auto" value="create" />
      </properties>
  </persistence-unit>
...
What we have here is a persistence unit called Dogs. The transaction type is RESOURCE_LOCAL - that tells the container not to use JTA. Below we specify JNDI data source name, entity classes and some properties. Note I don't have to specify typical data source properties (user name, password, url) - that's because they don't belong here. We define data source properties in JBoss.

dogs-ds.xml


This is a standard JBoss data source file. It must be called X-ds.xml.

<?xml version="1.0" encoding="UTF-8"?>

<datasources>
   <local-tx-datasource>

       <jndi-name>DogsDS</jndi-name>
       <connection-url>jdbc:hsqldb:hsql://localhost/dogsdb</connection-url>
       <driver-class>org.hsqldb.jdbcDriver</driver-class>
       <user-name>sa</user-name>
       <password></password>
       <min-pool-size>5</min-pool-size>
       <max-pool-size>20</max-pool-size>
       <idle-timeout-minutes>0</idle-timeout-minutes>
       <track-statements />
       <prepared-statement-cache-size>32</prepared-statement-cache-size>
       <metadata>
           <type-mapping>Hypersonic SQL</type-mapping>
       </metadata>
   </local-tx-datasource>
</datasources>
Nice and simple.

DAO


Last but not least, DAO that uses this setup.

   @PersistenceContext
   private EntityManager em;

   @SuppressWarnings("unchecked")
   @Transactional(readOnly = true)
   public List<Dog> retrieveAllDogs() {
       return em.createQuery("from Dog").getResultList();
   }

That's it! To run this example you need a database server running. I'm using HSQLDB. You can download source code and there is a batch file there that runs this HSQLDB server. The application is to be deployed on JBoss 6.

You call the transactional operation by accessing http://localhost:8080/springtx-nonjta-0.0.1-SNAPSHOT/myurl.

2011-05-20

git - compare branches

How to see the difference between two branches in git?

To display different lines:
git diff master..branch

To display different files:
git diff --name-status master..branch

You can make your console use colours to emphasise differences too:
git diff --color master..my251

You can swap branches to view it from the other perspective (depending on how you want to merge):
git diff branch..master

2011-05-19

APPARENT DEADLOCK with c3p0

When using Hibernate, JBoss 6, MySQL/HSQLDB, c3p0 for connection pooling, I got the following error (not a warning, as the log level seems to suggest) while running transactional JPA code.

WARN  [com.mchange.v2.async.ThreadPoolAsynchronousRunner]
(Timer-1) com.mchange.v2.async.ThreadPoolAsynchronousRunner
$DeadlockDetector@26d6221b -- APPARENT DEADLOCK!!!
(line breaks added for readability)

I'm sure there might be more than one reason for this. However, in my case what caused it was duplicate c3p0 declarations - I had them in two places:
  • persistence.xml file
  • dogs-ds.xml file (JBoss data source file)

The solution was to remove these lines from persistence.xml (which makes sense since the data source declaration is JBoss' job):

<property name="hibernate.c3p0.max_size" value="100" />
...

No more deadlock!

2011-05-13

git - format patch for single commit

With git, how to create a patch for a single commit?

git format-patch commit_id^..commit_id

2011-05-05

AspectJ: this() vs. target()

this() and target() are AspectJ poincuts for collecting context. What is the difference between them?

this()


That is the Java this object at the matching point.

target()


That is the Java object on which the method is called (or the object whose field is accessed).


… So, what’s the difference in practice? It turns out, it depends on the execution model you use - whether it’s execution or call.

Execution example


execution( void Dog.bark() ) && this( thisObject ) && target( targetObject )
thisObject will be a dog instance. targetObject will be the same dog instance. (If you’re wondering why, it depends on how AspectJ works under the hood - for execution it builds in your advice into the advised method.)

Call example


call( void Dog.bark() ) && this( thisObject ) && target( targetObject )
thisObject will be the instance that called dog.bark(). It could be any class that made this call. targetObject will, still, be a dog instance. (If you’re wondering why, it depends on how AspectJ works under the hood - for call it builds in your advice at the method call, not inside it.)

2011-05-04

AOP: AspectJ field access to inject dependencies

Since I’m reading a book on AspectJ, I figured out it would be possible to use AOP for dependency injection. I was sure the code would be concise and elegant, but I was wrong. Let’s start from the beginning.

This is what I wanted to have:

@Log
private static Logger log;

As you can see, I have a private static field, no getters or setters for it, it’s annotated with my custom @Log annotation.

Now, I wanted to use AspectJ to
  • seamlessly initialize this field
  • do it only once for every class where it’s used
  • and I wanted the initialized logger to be a logger for this particular class

Solution


Sadly, that’s the best I was able to come up with.

package me.m1key.test;

import java.lang.reflect.Field;

import org.slf4j.Logger;
import org.slf4j.LoggerFactory;

public aspect LogInjectAspect {

    pointcut loggerAccessed(Object a): get(@Log Logger me.m1key.test.*.*) && this(a);

    before(Object objectWithLog): loggerAccessed(objectWithLog) {
        for (Field field : objectWithLog.getClass().getDeclaredFields()) {
            field.setAccessible(true);
            if (field.getName().equals(thisJoinPoint.getSignature().getName())) {
                try {
                    if (field.get(null) == null) {
                        System.out.println("OMG I'm setting the value.");
                            field.set(objectWithLog, LoggerFactory.getLogger(objectWithLog.getClass()));
                    }
                } catch (IllegalArgumentException e) {
                    e.printStackTrace();
                } catch (IllegalAccessException e) {
                    e.printStackTrace();
                } catch (SecurityException e) {
                    e.printStackTrace();
                }
            }
        }
    }

}

I achieved what I wanted to achieve, but I had to use reflection. Also, this code fires every time log is accessed, although it is initialized only once (there’s a check). The code is pretty ugly and convoluted.
Shame, but that’s the best I could do.

Conclusion: use CDI for this purpose.

2011-05-01

duplicate key: interface javax.validation.constraints.Size

I got this error from JBoss while playing with RichFaces 4:

duplicate key: interface javax.validation.constraints.Size

JBoss and RichFaces 4 are not to blame - I am. I realized I switched RichFaces 4 versions (from 4.0.0.Final to 4.0.1-SNAPSHOT) and deployed both with my WAR file. So if you get this error, perhaps that’s what you should look into first.

RichFaces 4: More components

Hi, this is my third post on RichFaces 4. I’d like you to download the source code for this article and run it yourself (I run it on JBoss 6.0.0.Final). It does nothing very fancy, but it demonstrates a few RichFaces 4 components, and JSF 2.0 (that is, CDI, new annotations, Internationalization and more).

Below, highlights of the sample app.

rich:accordion


rich:accordion is a very simple component that allows you to have collapsible panels (and only one is open at a time).

Accordion

       <rich:accordion switchType="client">
           <rich:accordionItem header="#{msg['index.accordion.tab1.heading']}">
               <h:outputText value="#{msg['index.accordion.tab1.text']}" />
           </rich:accordionItem>
           <rich:accordionItem header="#{msg['index.accordion.tab2.heading']}">
               <h:outputText value="#{msg['index.accordion.tab2.text']}" />
           </rich:accordionItem>
       </rich:accordion>

Modal pop-up panel


Here’s a modal pop-up panel. You need to close it before all other page elements become accessible.

Modal Panel

<rich:popupPanel id="popup" modal="true" resizeable="false"
   onmaskclick="#{rich:component('popup')}.hide()">
   <f:facet name="header">
       <h:outputText value="#{msg['index.info.header']}" />
   </f:facet>
   <f:facet name="controls">
       <h:outputLink value="#"
           onclick="#{rich:component('popup')}.hide(); return false;">
       X
       </h:outputLink>
   </f:facet>
   <p>
       <h:outputText value="#{msg['index.info.text']}" />
   </p>
   <p>
       <h:outputLink value="#"
           onclick="#{rich:component('popup')}.hide(); return false;">
           <h:outputText value="#{msg['index.info.close']}" />
       </h:outputLink>
   </p>
</rich:popupPanel>

rich:dataTable


And now a dataTable. This is a fairly sophisticated component and you can see more if you browse RichFaces 4 showcase.

Data table

<h:form id="dogForm">
           <rich:messages />
           <rich:dataTable value="#{dogsBean.allDogs}" var="dog" id="table"
               rows="30">
               <f:facet name="noData">
                   <h:outputText value="#{msg['index.table.noData']}" />
               </f:facet>
               <rich:column filterValue="#{dogsFilteringBean.nameFilter}"
                   filterExpression="#{fn:containsIgnoreCase(dog.name,dogsFilteringBean.nameFilter)}">
                   <f:facet name="header">
                       <h:panelGroup>
                           <h:outputText value="#{msg['index.table.column.name']}" />
                           <h:inputText value="#{dogsFilteringBean.nameFilter}"
                               onkeypress="if (event.keyCode == 13) {return false;} else {return true;}">
                               <a4j:ajax event="blur" render="table" execute="@this" />
                           </h:inputText>
                       </h:panelGroup>
                   </f:facet>
                   <h:outputText value="#{dog.name}" />
               </rich:column>
           </rich:dataTable>
       </h:form>

As you can see, it allows you to filter data (and it’s AJAX based).

One thing you must take into account is that if focus is in the filter field and the Enter key is pressed - it will submit the form. I don’t think that’s the desired behavior, so I put a hack in there (onkeypress). I reported this as a bug and we’ll see what they answer.

Internationalization - I18N


This is not RichFaces 4 dependent, but since it’s used in the code above, I will demonstrate how it works.

WEB-INF/faces-config.xml

I have the following declaration in my faces-config.xml.

<?xml version="1.0" encoding="UTF-8"?>
<faces-config xmlns="http://java.sun.com/xml/ns/javaee"
   xmlns:xsi="http://www.w3.org/2001/XMLSchema-instance"
   xsi:schemaLocation="http://java.sun.com/xml/ns/javaee
    http://java.sun.com/xml/ns/javaee/web-facesconfig_2_0.xsd"
   version="2.0">
   <application>
       <locale-config>
           <default-locale>en</default-locale>
       </locale-config>
       <resource-bundle>
           <base-name>messages.messages</base-name>
           <var>msg</var>
       </resource-bundle>
   </application>
</faces-config>

messages/messages.properties

And this is a properties file that the previous declaration points to. It holds all the internationalized messages:

registration.title = Register
registration.h1 = Register
registration.email = Email:
registration.name = Name:
...

Usage

Then I can use it on my pages.

<h:outputText value="#{msg['registration.h1']}" />

Summary


In this article I demonstrated some RichFaces 4 components. The application itself has more goodies in it that you may want to check out. I wrote two more posts on RichFaces 4:

Don’t forget to download the source code for this article.

2011-04-24

RichFaces 4: AJAX validation feedback

In my previous post I showed you how to create a simple Maven based RichFaces 4 project. In this post I will show you how to provide a nice dynamic status for JSR-303 validation that may take a long time (check if user name is unique for instance).

AJAX feedback

Download sample code


Please note that I’ve been working a bit on the sample app so it has changed a little from its previous version. Therefore if you want to look at the source, please download the new version of my sample Maven 3, RichFaces 4, JSF 2 app.

The form


    <h:form rendered="#{!sessionTracker.loggedIn}">
       <rich:panel>
           <h:panelGrid columns="3">
               <h:outputText value="#{msg['registration.email']}" />
               <h:inputText id="email" value="#{registrationBean.email}">
                   <rich:validator />
               </h:inputText>
               <rich:message for="email" />

               <h:outputText value="#{msg['registration.name']}" />
               <h:inputText id="name" value="#{registrationBean.name}"
                   status="nameStatus">
                   <rich:validator status="nameStatus" />
               </h:inputText>
               <h:panelGroup>
                   <a4j:status name="nameStatus"
                       startText="#{msg['registration.checkingName']}"
                       startStyle="background-color: FFA500" />
                   <rich:message for="name" />
               </h:panelGroup>

               <h:commandButton value="#{msg['registration.register']}"
                   action="#{registrationBean.register}" />
           </h:panelGrid>
       </rich:panel>
   </h:form>

Backing bean


    @NotNull(message = "{rf.name.notNull}")
   @Size(min = 2, message = "{rf.name.size}")
   @ValidUserName
   public String getName() {
       return name;
   }

Validation


import javax.validation.ConstraintValidator;
import javax.validation.ConstraintValidatorContext;

import org.slf4j.Logger;
import org.slf4j.LoggerFactory;


public class ValidUserNameValidator implements
       ConstraintValidator<ValidUserName, String> {

   private Logger log = LoggerFactory.getLogger(ValidUserNameValidator.class);

   private String[] forbiddenNames = { "Michal", "Mikey", "Mickey", "M1key",
           "M1ckey" };

   @Override
   public void initialize(ValidUserName firstUpper) {
       // See JSR 303 Section 2.4.1 for sample implementation.
   }

   @Override
   public boolean isValid(String value, ConstraintValidatorContext context) {
       log.debug("Validating.");

       if (value == null || value.length() == 0) {
           return true;
       }

       // Let's simulate a costly operation.
       try {
           Thread.sleep(1000);
       } catch (InterruptedException e) {
           // TODO Auto-generated catch block
           e.printStackTrace();
       }

       return isNotForbidden(value);
   }


To see it working, download the source code. It expects you to run it on JBoss 6.0.0.Final.

2011-04-05

RichFaces 4: JSR 303 Validation

RichFaces 4 is out! In this article I will demonstrate one of the new features - JSR 303 validation with RichFaces 4.

RichFaces supports JSF 2, so I decided to write a small sample app that takes advantage of other JSF 2 goodies as well. Download the source code of this sample Maven 3 application that runs on JBoss 6 and see these in action (in simple action):
  • standard JSR 303 validation
  • custom JSR 303 validation
  • CDI
  • SLF4J
  • JSF 2


Standard JSR-303 Validation


First, look at this sample registration form.

    <h:form>
       <rich:panel>
           <h:panelGrid columns="3">
               <h:outputText value="Email:" />
               <h:inputText id="email" value="#{registration.email}">
                   <rich:validator />
               </h:inputText>
               <rich:message for="email" />

               <h:outputText value="Name:" />
               <h:inputText id="name" value="#{registration.name}">
                   <rich:validator />
               </h:inputText>
               <rich:message for="name" />

               <a4j:commandButton value="Register"
                   action="#{registration.register}" render="length" />
           </h:panelGrid>
       </rich:panel>
   </h:form>

Registration

What’s worth noting is the rich:validator element. That activates JSR 303 validation for that field. Let’s look at the corresponding managed bean.

package me.m1key.rf;

import javax.faces.bean.ManagedBean;
import javax.faces.bean.RequestScoped;
import javax.inject.Inject;
import javax.validation.constraints.NotNull;
import javax.validation.constraints.Pattern;
import javax.validation.constraints.Size;

@ManagedBean
@RequestScoped
public class Registration {
   
   @Inject
   private SessionTracker sessionTracker;

   private String email;
   private String name;

   @NotNull(message = "{rf.email.notNull}")
   @Pattern(message = "{rf.email.pattern}", regexp = "...")
   public String getEmail() {
       return email;
   }

   @NotNull(message = "{rf.name.notNull}")
   @Size(min = 2, message = "{rf.name.size}")
   public String getName() {
       return name;
   }
I spared you the regular expression for email validation. What’s cool about it? This gives you both automatic client-side and server side (in case someone turned off their JavaScript, for instance) validation.


Custom JSR-303 Validation


You might also annotate fields with your own validators. They will be picked up as well.

    @ValidUserName
   public String getName() {
       return name;
   }

@Documented
@Constraint(validatedBy = ValidUserNameValidator.class)
@Target({ METHOD, FIELD, ANNOTATION_TYPE, CONSTRUCTOR, PARAMETER })
@Retention(RetentionPolicy.RUNTIME)
public @interface ValidUserName {
   String message() default "{rf.validUserName}";

   Class<?>[] groups() default {};

   Class<? extends Payload>[] payload() default {};
}

public class ValidUserNameValidator implements
       ConstraintValidator<ValidUserName, String> {
   
   private Logger log = LoggerFactory.getLogger(ValidUserNameValidator.class);

   private String[] forbiddenNames = { "Michal", "Mikey", "Mickey", "M1key",
           "M1ckey" };

   @Override
   public void initialize(ValidUserName firstUpper) {
       // See JSR 303 Section 2.4.1 for sample implementation.
   }

   @Override
   public boolean isValid(String value, ConstraintValidatorContext context) {
       log.info("Validating");
       
       if (value == null || value.length() == 0) {
           return true;
       }


       return isNotForbidden(value);
   }

   private boolean isNotForbidden(String name) {
       return !isForbidden(name);
   }

   private boolean isForbidden(String name) {
       for (String forbiddenName : forbiddenNames) {
           if (name.equals(forbiddenName)) {
               return true;
           }
       }
       return false;
   }
}

CDI and other goodies


I will describe it in another blog post, but you can check it out already by downloading the source code. What I will also describe is how to add dynamic Ajax statuses for fields which validation takes long time.

2011-03-26

Tomcat extremely slow in debug mode

Hi there, a short piece of advice in case your Tomcat is running extremely slow in debug mode. The reason might be method breakpoints. The only way to help it is to disable them - at least I don’t know anything better than that.